Readers usually get bored with just reading, so putting some exciting pictures related to a topic increases the readers’ interest in your blog. WordPress galleries are the best way to capture your memorable pictures. In this article, we will show you how to create an image gallery in WordPress with Simple Steps.
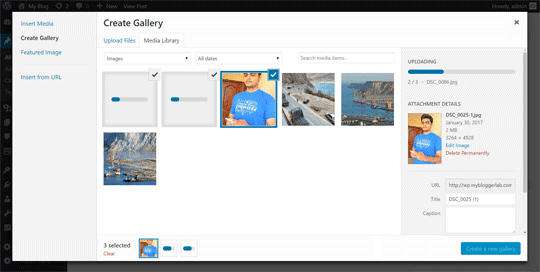
 Now click on the ‘Add media’ option at the top of the page. Next, click on “Create Gallery” to start building your image gallery.
 Since, we don't have any images on our test site we will upload a few images from our computer, you can drag and drop images or you can click on Select Files to upload images.
 Once all images are uploaded, you can add title, caption, alt texts and description to each image that you have uploaded. After writing all the necessary information to each image, select all the images that you would like to add to your image gallery. Once done, click on "Create a New Gallery' button.
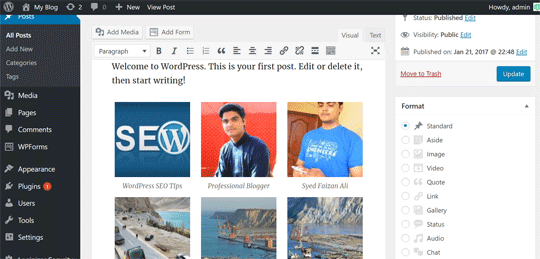
Now on the Edit Gallery, you can do various things to modify and polish your image gallery. For example, you can rearrange the order of images by changing their positions using simple drag and drop, add more images, Randomize the order, choose the number of columns and etc.

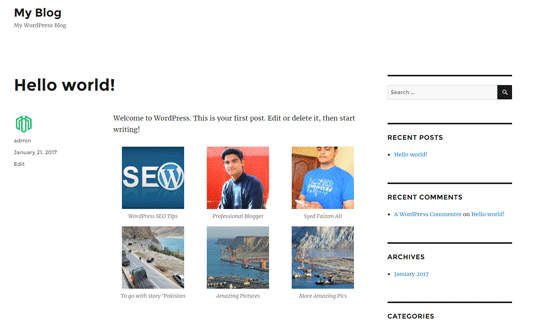
 Once you’re done, all you need to do is to publish the post. Here’s the results:

We hope this tutorial has helped you in learning how to create an image gallery in WordPress with simple steps that everyone can follow. If you like this article, follow us on Facebook, Google+ or Twitter.
Adding Image Gallery in WordPress Posts:
For inserting pictures, the first step is to choose which post you would like to add your image gallery. If you want to add image gallery to a new posts, Go to Posts >> Add New.


Now on the Edit Gallery, you can do various things to modify and polish your image gallery. For example, you can rearrange the order of images by changing their positions using simple drag and drop, add more images, Randomize the order, choose the number of columns and etc.

After editing your image gallery to best fit your needs you can click on "Insert Gallery" button to add your image gallery to WordPress posts. Your gallery will appear in the form of small thumbnails in your WordPress posts.
If you’re still not satisfied with your gallery you can click on the thumbnail to edit them as per your needs.


We hope this tutorial has helped you in learning how to create an image gallery in WordPress with simple steps that everyone can follow. If you like this article, follow us on Facebook, Google+ or Twitter.
إرسال تعليق
If you have any Questions related to the above post. You can comment below in comment box. I will be happy to Answer you !